Introduction
As the holiday season approaches, transforming ordinary cupcakes into festive Christmas tree cupcakes can bring joy to any celebration. These delightful treats not only satisfy your sweet tooth but also double as an enchanting centerpiece for your gatherings. With vibrant colors and whimsical decorations, each cupcake captures the essence of the holiday spirit.
Creating Christmas tree cupcakes allows you to express your creativity in the kitchen. The combination of flavors and textures intricately layered in these delightful confections brings a smile to both children and adults alike. Whether you're hosting a holiday party or simply looking to spread some festive cheer, these cupcakes are sure to impress.
Ingredients
- 1 ½ cups all-purpose flour
All-purpose flour forms the structure of the cupcakes, providing the necessary stability and texture. It's a versatile base that allows for a tender crumb, which will hold up well to the frosting and decorations. - 1 cup granulated sugar
Sugar not only sweetens the cupcakes, but it also contributes to the moistness and tenderness of the finished product. During baking, sugar caramelizes to enhance flavor and color. - ½ cup unsalted butter, softened
Butter adds richness and flavor, while also aiding in the tenderness of the cupcakes. Creaming the butter with sugar helps to incorporate air, giving the cupcakes a light and fluffy texture. - 2 large eggs
Eggs bind the ingredients together and provide structure. They also add moisture and richness, ensuring that the cupcakes have a satisfying mouthfeel. - 1 teaspoon vanilla extract
Vanilla extract enhances the overall flavor profile of the cupcakes, adding warmth and depth. It complements the sweetness beautifully, creating a balanced dessert. - 1 ½ teaspoons baking powder
Baking powder acts as a leavening agent, helping the cupcakes rise and achieve a light texture. It creates air pockets in the batter during baking, resulting in soft, fluffy cupcakes. - ½ teaspoon salt
Salt intensifies the sweetness and balances flavors. It also enhances the overall taste by cutting through any overly sweet elements. - ½ cup milk
Milk adds moisture to the batter, which is essential for achieving a soft texture. It also helps to combine the dry ingredients, creating a smooth, even batter. - Green buttercream frosting
The tree's 'leaves' are made from vibrant green buttercream, which not only adds color but also contributes to the sugary sweetness of the cupcakes. Its smooth texture makes it perfect for piping. - Decorative toppings (sprinkles, candy stars, etc.)
These toppings serve as the ornaments of the cupcakes, adding a playful touch and enhancing visual appeal. They also provide additional textures and flavors, making the cupcakes festive.
Directions & Preparation
Step 1: Preheat the oven to 350°F (175°C).
Preheating your oven is crucial as it ensures even baking. An adequately heated oven helps the cupcakes rise properly from the moment they go in, preventing dense or uneven textures. It typically takes about 10-15 minutes to reach the desired temperature, so do this first.
Step 2: Line a cupcake tin with paper liners.
Using paper liners not only adds a decorative touch but also makes it easier to remove the cupcakes once baked. These liners help maintain the shape of the cupcakes while preventing them from sticking to the tin, allowing for easy cleanup afterward.
Step 3: In a large mixing bowl, cream together the softened butter and sugar.
Creaming butter with sugar is vital for incorporating air into the mixture, which results in lighter cupcakes. This process should take about 3-5 minutes until the mixture looks fluffy and pale, signaling that the air is trapped effectively.
Step 4: Add the eggs, one at a time, mixing well after each addition.
Adding eggs one at a time ensures they are fully incorporated, which contributes to a moist batter. This step is key to maximizing the emulsification of the fat and liquids, providing structure and richness to your cupcakes.
Step 5: Mix in the vanilla extract.
Incorporating vanilla extract at this stage helps develop the sweetness and depth of flavor in your batter. Vanilla enhances all surrounding flavors and is essential for a well-rounded cupcake.
Step 6: In another bowl, combine the flour, baking powder, and salt.
Sifting the dry ingredients together is an important step that helps to ensure even distribution of the leavening agent and salt, which will impact the rise and flavor of your cupcakes. This brief mixing also breaks up any lumps in the flour.
Step 7: Gradually add the dry mixture to the wet ingredients, alternating with the milk.
Adding the dry ingredients alternately with the milk prevents the batter from becoming overly heavy. This technique aids in achieving the perfect consistency for your cupcakes, resulting in a light and fluffy texture.
Step 8: Fill each cupcake liner about two-thirds full with batter.
Filling the liners to the right height helps ensure even rising and prevents overflow during baking. This will create nicely shaped cupcakes that are visually appealing as they create a rounded top.
Step 9: Bake for 20-25 minutes, or until a toothpick comes out clean.
It is essential to keep an eye on the baking process. Testing with a toothpick at the 20-minute mark helps ensure that you don’t overbake, which can lead to dryness. A clean toothpick indicates a perfect bake, so always trust this cue.
Step 10: Allow the cupcakes to cool completely before decorating.
Cooling the cupcakes is crucial as it prevents the frosting from melting off. If the cupcakes are warm, it can create a messy situation when you attempt to pipe your frosting. A cooling rack is ideal for this step.
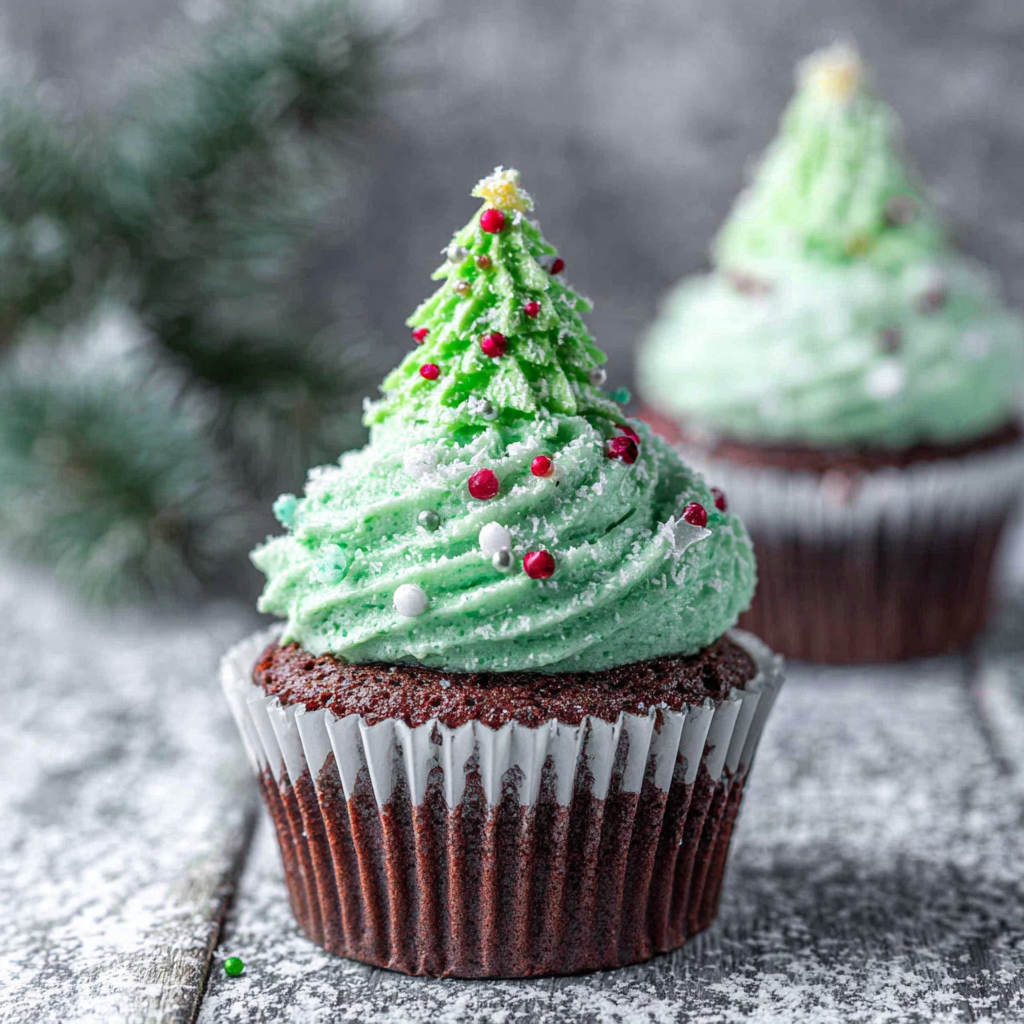
Step 11: Pipe green buttercream frosting on the cupcakes to resemble Christmas trees.
Piping the frosting in a tree-like shape requires a bit of practice, but the effort pays off for a beautiful presentation. Use a star-shaped piping tip for realistic branches and varying pressure to create dimension on each ‘tree.’
Step 12: Decorate with your chosen toppings.
Adding decorative toppings at the end brings your cupcakes to life. These finishing touches make the treats festive and fun, so feel free to let your creativity shine. Use a mix of colors for visual impact, mimicking an array of holiday decorations.

Choosing the Right Frosting
The type of frosting used can significantly impact the visual appeal and taste of your Christmas tree cupcakes. While buttercream is the go-to choice for its ease of piping and great flavor, consider experimenting with cream cheese frosting for a tangier note or even whipped cream for a lighter texture. Make sure whatever frosting you choose holds its shape well so your trees stay upright and vibrant.
Creative Decoration Ideas
Transforming your cupcakes into delightful Christmas trees means getting creative with decorations. Consider using different colored sprinkles to mimic ornaments and sequencing candy stars on top to represent tree toppers. Edible glitter can add a magical touch, making your cupcakes look even more festive. Each decoration choice allows for personalization, enabling every batch to be unique—encouraging a fun decorating session with family.
Flavor Variations to Try
While classic vanilla cupcakes are delicious, there are many ways to switch up the flavor profile. Add peppermint extract for a refreshing twist that captures the essence of the holidays. You can also fold in cocoa powder for a chocolate base or citrus zest for a zesty note, creating variety that will delight your guests. These variations keep the cupcakes interesting and cater to various taste preferences.
FAQs
Can I use a different flavor of frosting?
Absolutely! Feel free to use cream cheese frosting, chocolate ganache, or even whipped cream for a lighter option, depending on your preferences.
What do I do if my frosting is too thick?
If your frosting is too thick, add a teaspoon of milk or cream a little at a time, mixing well until you reach the desired consistency for piping.
How can I make these cupcakes more festive?
Consider adding edible glitter, themed sprinkles, or decorative candy shapes that reflect the holiday spirit. Layering colors can also elevate their visual appeal.
Is there a way to make mini versions of these cupcakes?
Yes! Simply use a mini cupcake pan and adjust baking time to about 10-15 minutes for smaller, bite-sized tree cupcakes.
What if my frosting doesn't hold its shape?
This may happen if it's too soft. Ensure it's well-chilled and thickened before piping. If still soft, consider adding more powdered sugar.
Can I customize the colors of the frosting?
Certainly! Gel food coloring allows for vibrant colors, so you can create different shades of green or even other colors for themed occasions.
Conclusion
Creating Christmas tree cupcakes is a wonderfully engaging way to celebrate the festive season. Not only do they taste great, but they also provide a canvas for creativity that can involve your loved ones in the kitchen. With the flexibility of flavors and designs, each batch can reflect your personal style or holiday theme.
As you gather around with friends and family to enjoy these delightful treats, remember that sharing the joy of baking is just as important as the final product. Embrace the holiday spirit, spread cheer, and enjoy every delicious bite of your creative efforts.
Recipe Card

Perfecting the Classic Roast Turkey for Any Occasion
Ingredients
- 12-14 lbs whole turkey
- 1/2 cup unsalted butter softened
- 2 tablespoons salt
- 1 tablespoon black pepper
- 2 teaspoons dried thyme
- 2 teaspoons dried rosemary
- 1 lemon halved
- 1 onion quartered
- 4 cups low-sodium chicken broth
- Fresh herbs thyme, rosemary, sage for stuffing
Instructions
- Prepare the Turkey
- Season the Turkey
- Stuff the Turkey
- Preheat the Oven
- Place the Turkey in the Oven
- Baste Regularly
- Check the Temperature
- Rest the Turkey
- Carve and Serve
Notes
Additional serving suggestions: pair with a crisp salad, garlic bread, or roasted seasonal vegetables for balance.
For make-ahead, prep components separately and assemble just before heating to preserve texture.
Taste and adjust with acid (lemon/vinegar) and salt right at the end to wake up flavors.