
Introduction
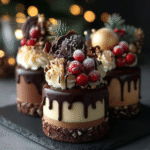
As the holiday season approaches, the desire to create something special in the kitchen grows. Mini Christmas cakes provide the perfect opportunity to charm friends and family with personal, bite-sized delights. Their festive appearance and rich flavors make them an ideal centerpiece for any holiday gathering.
These mini cakes are not only visually appealing; they are easy to prepare and customizable to suit your taste preferences. Topped with luxurious ganache, each little cake encapsulates the warmth of the holidays. With the right ingredients and a sprinkle of creativity, you can create delightful desserts that will make the season even more memorable.
Ingredients
- 250g all-purpose flour
All-purpose flour provides the structure and base of the cakes, allowing them to rise and hold their form. Its moderate gluten content strikes a balance, keeping the cakes tender yet sturdy. - 200g unsalted butter
Butter enriches the batter and contributes to a moist texture. It also adds a rich flavor that enhances the overall taste of the cakes. - 200g granulated sugar
Sugar not only sweetens the cakes but also helps in achieving a desirable crumb texture. It aids in browning during baking, giving a lovely golden hue. - 4 large eggs
Eggs act as a binding agent, helping to hold the ingredients together and create structure in the cakes. They also support leavening, as the air whipped into the eggs adds lightness. - 100ml milk
Milk adds moisture and contributes to the softness of the cake. It helps to dissolve the sugar and develops a richer flavor profile. - 1 tsp vanilla extract
Vanilla extract enhances the overall flavor of the cakes, providing a warm, inviting aroma that pairs perfectly with the festive season. - 1 tsp baking powder
Baking powder is a leavening agent that helps the cakes rise, creating a fluffy texture. Ensuring the freshness of the baking powder can impact the cakes' height. - Pinch of salt
Salt balances the sweetness and enhances the other flavors, making the cakes more flavorful. It is essential to give depth to the overall taste. - 200g dark chocolate
Dark chocolate is the key ingredient in the ganache, providing a rich, intense flavor. It coats the cakes beautifully, creating an elegant finish. - 150ml heavy cream
Heavy cream is used in the ganache to create a smooth, glossy texture. It adds richness and helps the chocolate to set properly. - Decorative toppings (e.g., berries, nuts)
Decorative toppings add an aesthetic touch and a burst of flavor. They make the mini cakes visually appealing and encourage personalization.
Directions & Preparation
Step 1: Preheat the oven to 180°C (350°F).
Preheating the oven is a crucial first step to ensure even baking. This temperature allows the cakes to rise properly, resulting in a light and tender texture. Make sure your oven thermometer is accurate, as variances can affect the final outcome.
Step 2: Grease and line mini cake pans with parchment paper.
Greasing and lining the pans will prevent the cakes from sticking, ensuring easy removal. Use a little butter or cooking spray, then place cut parchment to fit the pan's bottom and sides for added insurance.
Step 3: In a large bowl, cream together the butter and sugar until light and fluffy.
Creaming the butter and sugar aerates the mixture, incorporating air necessary for the cakes to rise. The aim is a pale, fluffy texture that indicates the sugar has begun to dissolve, enhancing sweetness.
Step 4: Add eggs one at a time, beating well after each addition.
By adding the eggs one at a time, you maintain the emulsion and prevent the batter from separating. This also allows for better incorporation into the butter-sugar mixture, which helps achieve a uniform texture.
Step 5: Mix in the vanilla extract and milk until combined.
Incorporating milk and vanilla at this stage enhances the batter’s moisture and flavor. The liquid will help blend any remaining flour and ensure the mixture is smooth before adding the dry ingredients.
Step 6: In a separate bowl, sift together the flour, baking powder, and salt.
Sifting the dry ingredients helps to break up any clumps and ensures even distribution of the leavening agent. This crucial step contributes to the uniform rise of the cakes.
Step 7: Gradually fold the dry mixture into the wet ingredients until just combined.
Folding rather than stirring prevents overworking the batter, which could lead to dense cakes. It's important to combine until no dry flour remains, ensuring a soft texture.
Step 8: Divide the batter evenly among the prepared mini cake pans.
Even division of the batter ensures consistent baking times and uniform cake sizes. This step is key for presentation as well, providing a neat, professional appearance.
Step 9: Bake for 15-20 minutes or until a toothpick inserted into the center comes out clean.
Baking for the correct duration helps achieve the desired texture. Checking the cakes with a toothpick after 15 minutes allows monitoring—take care to avoid overbaking for moist cakes.
Step 10: Allow the cakes to cool in the pans for 10 minutes, then transfer to a wire rack to cool completely.
Cooling in the pans allows the cakes to set and makes them easier to remove without breaking. Transferring to a wire rack allows even cooling, preventing sogginess at the bottom.
Step 11: Prepare the ganache by heating the cream and pouring it over the chopped dark chocolate, letting it sit for a few minutes.
Heating the cream brings it just to a simmer, which is key for melting the chocolate smoothly. Allowing it to sit ensures the chocolate softens thoroughly for a glossy ganache.
Step 12: Stir the chocolate and cream mixture until smooth and combined.
Stirring gently helps incorporate the chocolate and cream into a homogeneous mixture. The goal is to create a glossy texture that can be poured over the cooled mini cakes.
Step 13: Once the cakes are completely cool, pour the ganache over each mini cake, letting it drip down the sides.
Pouring the ganache over cooled cakes creates a beautiful, decadent presentation. Allowing it to drip adds a touch of elegance, enhancing the festive appeal of each mini cake.
Step 14: Decorate with your choice of toppings, such as fresh berries or nuts.
Toppings not only enhance the visual appearance but also add texture and complementary flavors. Personalizing each mini cake with different decorations adds to the festive charm.
Step 15: Let the ganache set for at least 30 minutes before serving.
Allowing the ganache to set gives it a glossy finish and helps it bind to the cakes. This waiting period is essential for achieving that perfect slice and enjoyable bite.

Personalize Your Mini Cakes
One of the joys of making mini Christmas cakes is the chance to personalize them. You can vary the flavors and decorations to match your family's taste. Consider adding spices like cinnamon or nutmeg to the batter for a warm, festive note. Experiment with different fillings, like fruit preserves or flavored creams, between layers, creating a delightful surprise with each bite.
Serving Ideas for the Holidays
These mini cakes serve as a perfect sweet treat to elevate any holiday gathering. Consider presenting them on a decorative platter, adorned with seasonal greenery or fairy lights to enhance the festive atmosphere. Pair them with a warm cup of spiced tea or mulled wine for a rustic holiday celebration that will leave your guests enchanted.
Storing and Enjoying Leftovers
If you have any mini cakes left after the festivities, storing them properly ensures they remain delicious for days. Airtight containers keep them fresh, and they can also be refrigerated for longer shelf life. You can bring them back to life by warming them slightly before serving, enhancing the flavors and textures, perfect for indulging during cozy winter evenings.
FAQs
Why is my ganache too thick to pour?
If your ganache is too thick, it may be because the chocolate was too cool or the cream was not heated enough. Try warming the mixture gently over low heat and stir until it achieves a smooth, pourable consistency.
Can I use milk chocolate instead of dark for the ganache?
Yes, you can use milk chocolate for a sweeter alternative, but adjust the cream amount to maintain the desired consistency. Milk chocolate will create a creamier ganache with a lighter flavor.
What can I do if my cakes rise unevenly?
If your cakes have risen unevenly, ensure that the oven temperature is accurate, and check that the batter is evenly distributed in the pans before baking. Using room-temperature ingredients can also lead to a more uniform rise.
How can I make the cakes more festive in flavor?
Consider adding festive flavors like orange zest, almond extract, or a splash of rum to the batter. These additions will enhance the holiday spirit and make your cakes stand out.
Why did my cakes stick to the pans?
If cakes stick, it may be due to insufficient greasing or lining. Ensure the pans are well-greased, and the parchment paper is secure in place to prevent sticking and ensure a clean release.
What decorative options can I use for topping?
Top the cakes with a variety of options including candied fruit, edible glitter, or even small figures to represent the season, enhancing your dessert's festive cheer.
Conclusion
Mini Christmas cakes with ganache are a delightful way to celebrate the holidays. Their charm lies in their personal size and the joy they bring to any gathering. Engaging in the kitchen to create these treats adds a layer of festivity to your celebrations.
By incorporating your own variations and toppings, each cake becomes a canvas for creativity. Enjoy the process of making and sharing these little masterpieces, bringing warmth and sweetness to your holiday season.
Recipe Card
Delightful Mini Christmas Cakes with Rich Ganache
Ingredients
- 250 g all-purpose flour
- 200 g unsalted butter
- 200 g granulated sugar
- 4 large eggs
- 100 ml milk
- 1 tsp vanilla extract
- 1 tsp baking powder
- Pinch of salt
- 200 g dark chocolate
- 150 ml heavy cream
- Decorative toppings e.g., berries, nuts
Instructions
- Preheat the oven to 180°C (350°F).
- Grease and line mini cake pans with parchment paper.
- In a large bowl, cream together the butter and sugar until light and fluffy.
- Add eggs one at a time, beating well after each addition.
- Mix in the vanilla extract and milk until combined.
- In a separate bowl, sift together the flour, baking powder, and salt.
- Gradually fold the dry mixture into the wet ingredients until just combined.
- Divide the batter evenly among the prepared mini cake pans.
- Bake for 15-20 minutes or until a toothpick inserted into the center comes out clean.
- Allow the cakes to cool in the pans for 10 minutes, then transfer to a wire rack to cool completely.
- Prepare the ganache by heating the cream and pouring it over the chopped dark chocolate, letting it sit for a few minutes.
- Stir the chocolate and cream mixture until smooth and combined.
- Once the cakes are completely cool, pour the ganache over each mini cake, letting it drip down the sides.
- Decorate with your choice of toppings, such as fresh berries or nuts.
- Let the ganache set for at least 30 minutes before serving.
Notes
Additional serving suggestions: pair with a crisp salad, garlic bread, or roasted seasonal vegetables for balance.
For make-ahead, prep components separately and assemble just before heating to preserve texture.
Taste and adjust with acid (lemon/vinegar) and salt right at the end to wake up flavors.