Introduction
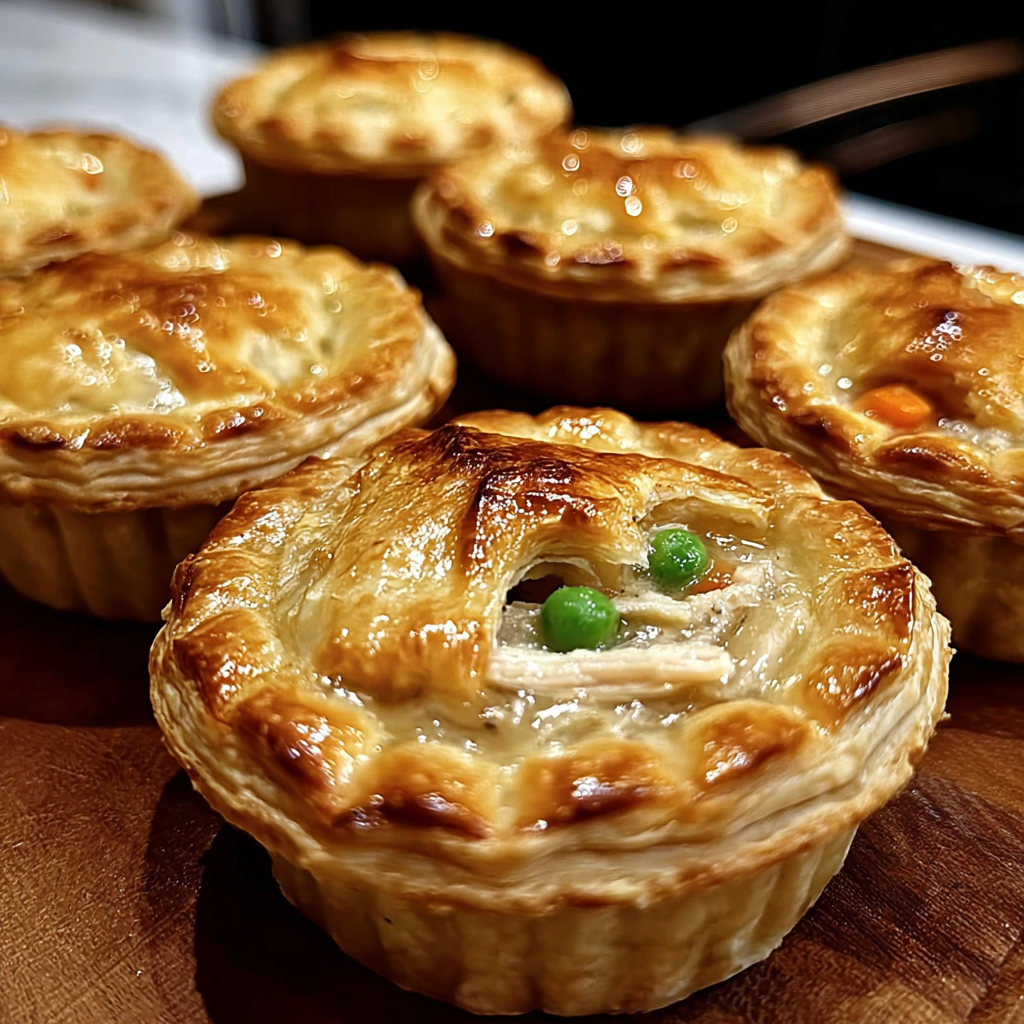
Mini chicken pot pies are a beloved comfort food, perfect for warming up any chilly evening. These delightful little pies combine tender chicken, vibrant vegetables, and a creamy sauce all encased in a flaky pastry crust. They bring joy to the dinner table, making every bite a little celebration.
What makes these mini pot pies truly special is their versatility. You can customize the filling based on the ingredients you have on hand, whether it’s leftover roast chicken or an array of seasonal vegetables. This adaptability not only reduces waste but also sparks creativity in the kitchen.
Plus, they are the ideal portion size for easy serving, allowing each person to enjoy their own individual pie. Whether it’s a family dinner, gathering with friends, or just a cozy night in, these mini chicken pot pies are sure to please.
Ingredients
- 2 cups cooked chicken, shredded
Using cooked chicken saves time and ensures the meat is tender. Rotisserie chicken is a great option here as it adds flavor and convenience. - 1 cup frozen mixed vegetables
Frozen vegetables are not only budget-friendly but also retain nutrients and flavor. They eliminate the need for chopping and prep work, making the process quicker. - 1/4 cup onion, finely chopped
Onions add a depth of flavor and aromatic quality to the filling, enhancing the overall taste of the pot pie. - 1/4 cup butter
Butter creates a rich base for the sauce, contributing to the overall creaminess and flavor of the filling. - 1/4 cup all-purpose flour
Flour is essential for thickening the sauce. It helps create that desirable creamy consistency that coats the chicken and veggies. - 1 cup chicken broth
Chicken broth infuses the filling with savory flavor while keeping the mixture moist and delicious. It is the backbone of the sauce. - 1 cup milk
Milk adds richness and creaminess to the sauce. It balances the flavors and helps achieve the ideal consistency. - 1 teaspoon garlic powder
Garlic powder brings a subtle hint of garlic flavor without overpowering the dish. It's an easy way to enhance taste. - 1 teaspoon dried thyme
Thyme provides an earthy aroma and complements the chicken beautifully, elevating the herbaceous quality of the filling. - Salt and pepper to taste
Seasoning is crucial for bringing out the natural flavors of the ingredients. Adjusting to taste ensures the perfect balance. - 1 package (2 sheets) refrigerated pie crusts
Using pre-made pie crusts simplifies the process, allowing you to focus on the filling while still achieving a homemade feel. - 1 egg, beaten (for egg wash)
An egg wash gives the crust a beautiful golden color when baked, enhancing the visual appeal of the finished pies.
Directions & Preparation
Step 1: Preheat the oven to 425°F (220°C).
Preheating the oven ensures even cooking and helps achieve a deliciously crispy crust. Make sure it’s fully heated before placing the pot pies inside.
Step 2: In a large saucepan, melt the butter over medium heat.
Melting the butter provides the foundation for your sauce and allows the onions to cook. Stirring frequently will prevent the butter from browning and maintain its rich flavor.
Step 3: Add the chopped onions to the butter and sauté until translucent, about 3-4 minutes.
This step develops flavors in the filling. Cooking the onions until they are translucent ensures they are tender and develop a sweet, aromatic quality.
Step 4: Stir in the flour and cook for another 1-2 minutes.
Cooking the flour with the onions helps eliminate the raw taste, and it thickens the sauce once the broth and milk are added. It's a crucial step for achieving the right texture.
Step 5: Gradually whisk in the chicken broth and milk until the mixture is smooth.
Whisking gradually helps prevent lumps in the sauce, resulting in a silky texture. This step allows the flour to thicken the mixture properly, creating a creamy filling.
Step 6: Add the shredded chicken, frozen vegetables, garlic powder, dried thyme, salt, and pepper.
This is where the filling comes together. Be sure to mix well so that all ingredients are evenly coated with the creamy sauce, enhancing both flavor and texture.
Step 7: Remove the saucepan from the heat and let the filling cool slightly while you prepare the crusts.
Allowing the filling to cool makes it easier to handle and prevents the crust from becoming soggy. This also allows flavors to meld further.
Step 8: Roll out one pie crust and place it in the bottom of your muffin tin or ramekins.
This creates the base for your mini pies. Ensure the crust covers the bottoms and sides well to hold the filling securely.
Step 9: Spoon a generous amount of the chicken filling into each crust.
Avoid overfilling, as this can cause the filling to overflow during baking. A well-measured portion allows for a balanced crust-to-filling ratio.
Step 10: Roll out the second pie crust and place it over the filling, sealing the edges gently.
Creating a seal prevents the filling from bubbling over and keeps the pies contained. You can crimp the edges for a decorative touch.
Step 11: Cut a few slits in the top crust to allow steam to escape.
These slits are essential to prevent the pies from becoming too soggy or exploding in the oven. They create ventilation and help achieve a golden crust.
Step 12: Brush the top of each pie with beaten egg for a golden finish.
The egg wash enhances the appearance and contributes to a beautiful, crispy top. Skipping this step can result in a pale crust.
Step 13: Bake in the preheated oven for 25-30 minutes, or until the crust is golden brown.
Careful monitoring ensures you catch them at the perfect time. A nicely browned crust indicates the filling is heated through and flavors are well-developed.
Step 14: Allow the mini pot pies to cool for a few minutes before serving.
This cooling period makes them easier to handle and cools down the filling slightly. It prevents anyone from burning their mouths and allows for better flavor appreciation.

Customizing Your Mini Chicken Pot Pies
One of the best aspects of mini chicken pot pies is their adaptability. You can easily swap out the chicken for turkey, or even use leftover vegetables to boost nutrition. Feel free to add different herbs or spices to suit your family's tastes. Exploring various combinations can lead to delightful surprises and make mealtime more exciting.
Perfecting the Crust for Mini Pies
Achieving the perfect crust is crucial to the success of your mini chicken pot pies. Ensure your pie crusts are kept cold until you're ready to use them; this helps maintain their flakiness during baking. If you're feeling adventurous, consider making your own crust using a mixture of all-purpose and whole wheat flour for added flavor and texture. Experimenting can lead to a crust that complements your filling beautifully.
Serving Suggestions for Mini Pot Pies
These mini chicken pot pies are a meal in themselves but can be complemented with various sides. A crisp green salad with a light vinaigrette can enhance the dining experience without overwhelming flavors. Alternatively, a side of roasted vegetables adds warmth and heartiness, rounding out your meal. These pies are also perfect for entertaining, making them a vibrant centerpiece on any table.
FAQs
What if my filling is too thick?
If your filling turns out too thick, you can add a little extra chicken broth or milk to loosen it. Stir well until you achieve your desired consistency.
Can I use different types of meat for this recipe?
Absolutely! You can use turkey, beef, or even tofu as a protein option. Each will bring its unique flavor to the pot pies.
My pot pies came out bland; what can I do?
If your pot pies are bland, try increasing the seasoning or adding a splash of soy sauce or Worcestershire sauce for extra flavor.
Can I use fresh vegetables instead of frozen?
Yes, you can use fresh vegetables! Just make sure to sauté them until they're tender before adding them to the filling.
How do I know when they are done baking?
Look for a golden brown crust and bubbling filling. A toothpick inserted in the middle should come out clean.
Can I make the filling in advance?
Yes, you can prepare the filling ahead of time and store it in the refrigerator. Assemble the pies just before baking for the best results.
Conclusion
Mini chicken pot pies are not just food; they are a warm hug in a flaky crust. Their comforting flavors and delightful aroma can bring happiness to any meal.
Encouraging creativity in the kitchen, these little pies welcome various interpretations based on personal preference and seasonal ingredients. So, roll up your sleeves and enjoy the process of making these scrumptious bites!
Recipe Card
Delightful Mini Chicken Pot Pies for Cozy Nights
Ingredients
- 2 cups cooked chicken shredded
- 1 cup frozen mixed vegetables
- 1/4 cup onion finely chopped
- 1/4 cup butter
- 1/4 cup all-purpose flour
- 1 cup chicken broth
- 1 cup milk
- 1 teaspoon garlic powder
- 1 teaspoon dried thyme
- Salt and pepper to taste
- 1 package 2 sheets refrigerated pie crusts
- 1 egg beaten (for egg wash)
Instructions
- Preheat the oven to 425°F (220°C).
- In a large saucepan, melt the butter over medium heat.
- Add the chopped onions to the butter and sauté until translucent, about 3-4 minutes.
- Stir in the flour and cook for another 1-2 minutes.
- Gradually whisk in the chicken broth and milk until the mixture is smooth.
- Add the shredded chicken, frozen vegetables, garlic powder, dried thyme, salt, and pepper.
- Remove the saucepan from the heat and let the filling cool slightly while you prepare the crusts.
- Roll out one pie crust and place it in the bottom of your muffin tin or ramekins.
- Spoon a generous amount of the chicken filling into each crust.
- Roll out the second pie crust and place it over the filling, sealing the edges gently.
- Cut a few slits in the top crust to allow steam to escape.
- Brush the top of each pie with beaten egg for a golden finish.
- Bake in the preheated oven for 25-30 minutes, or until the crust is golden brown.
- Allow the mini pot pies to cool for a few minutes before serving.
Notes
Additional serving suggestions: pair with a crisp salad, garlic bread, or roasted seasonal vegetables for balance.
For make-ahead, prep components separately and assemble just before heating to preserve texture.
Taste and adjust with acid (lemon/vinegar) and salt right at the end to wake up flavors.