If you’ve ever bitten into a perfectly crispy, lightly salted saltine cracker, you know there’s something incredibly satisfying about this humble snack. Whether enjoyed with soup, cheese, or just on their own, homemade saltine crackers bring a fresh, buttery, and delightful crunch that store-bought versions often can’t match.
In this comprehensive guide, we’ll dive deep into everything you need to know about making delicious homemade saltine crackers from scratch. We’ll cover the recipe in detail, tips for perfecting your technique, creative serving ideas, storage secrets, and even some fun history about these classic crackers. By the time you finish reading, you’ll be ready to bake a batch of crispy, golden, irresistible crackers that will quickly become your go-to snack.
So, grab your rolling pin and let’s get started on making the best homemade saltine crackers you’ve ever tasted!
Why Make Homemade Saltine Crackers?
Saltine crackers are a staple in many households, but the store-bought versions often lack freshness and can taste a bit bland or stale. Making homemade saltine crackers lets you control the ingredients, texture, and seasoning. You’ll get that perfect crispiness with a rich, buttery flavor that’s unmatched.
Benefits of Homemade Saltine Crackers:
- Freshness: No preservatives or additives; you bake them fresh whenever you want.
- Customization: Adjust salt levels, butter content, or experiment with herbs and spices.
- Cost-Effective: Flour, butter, and basic ingredients are affordable compared to pre-packaged crackers.
- Satisfaction: The joy of baking and sharing your own crunchy creation!
In this guide, we’ll show you an easy, foolproof recipe that produces about 40 perfect crackers, crisp on the outside and tender inside.
Ingredients for Perfect Homemade Saltine Crackers
Before we dive into the step-by-step instructions, let’s review the simple yet essential ingredients that make these crackers stand out.
- 2 cups all-purpose flour – This is the base that gives your crackers structure.
- 1 teaspoon baking powder – Adds a slight lift and flakiness.
- 1/2 teaspoon salt (plus extra for topping) – Salt enhances flavor and brings out the buttery notes.
- 2/3 cup warm water – Helps form the dough; make sure it’s warm, not hot.
- 2 tablespoons butter, melted (plus more for brushing) – Butter is key for flavor and tenderness.
These five ingredients come together to create a beautifully balanced dough that bakes into crispy crackers with a golden finish.
Step-by-Step Guide to Making Delicious Homemade Saltine Crackers
Step 1: Preheat and Prepare Your Baking Surface
Start by preheating your oven to 400°F (200°C). This high temperature ensures quick baking and crispiness. Line a baking sheet with parchment paper or lightly grease it to prevent sticking.
Step 2: Mix Dry Ingredients
In a large mixing bowl, combine 2 cups all-purpose flour, 1 teaspoon baking powder, and 1/2 teaspoon salt. Whisk them together well to ensure even distribution of the baking powder and salt.
Step 3: Add Wet Ingredients and Form Dough
Slowly stir in 2/3 cup warm water and 2 tablespoons melted butter to the dry mix. Use a spoon or your hands to bring everything together until a rough dough forms.
Step 4: Knead the Dough
Lightly flour your workspace and knead the dough for about 2 minutes until it’s smooth and elastic. Kneading activates gluten, giving your crackers the perfect texture.
Step 5: Roll Out the Dough Thinly
This is crucial: Roll the dough out as thin as possible — about 1/8 inch or less. The thinner your dough, the crispier your crackers will be. Use a rolling pin to get an even thickness.
Step 6: Cut the Crackers
Using a sharp knife or pizza cutter, cut the rolled dough into small squares or rectangles, roughly 2 inches each side. Don’t worry about perfect uniformity — rustic charm is part of the appeal!
Step 7: Dock the Crackers
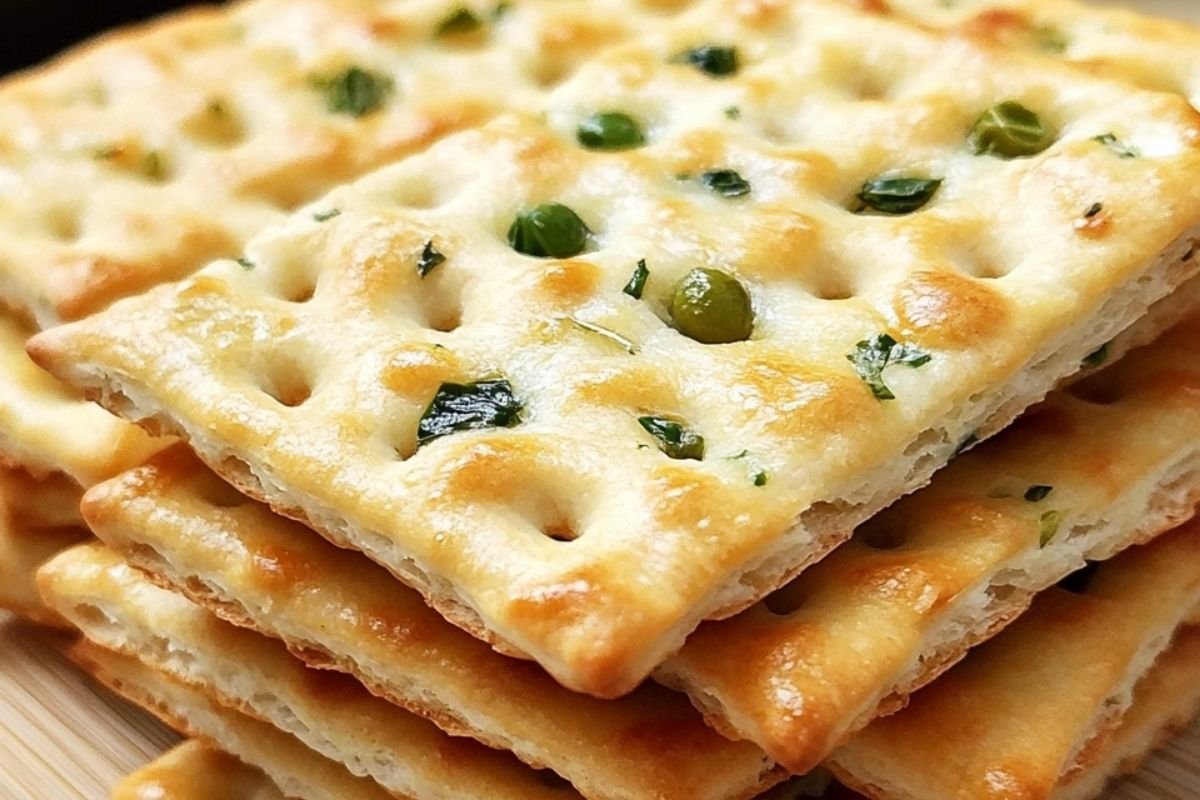
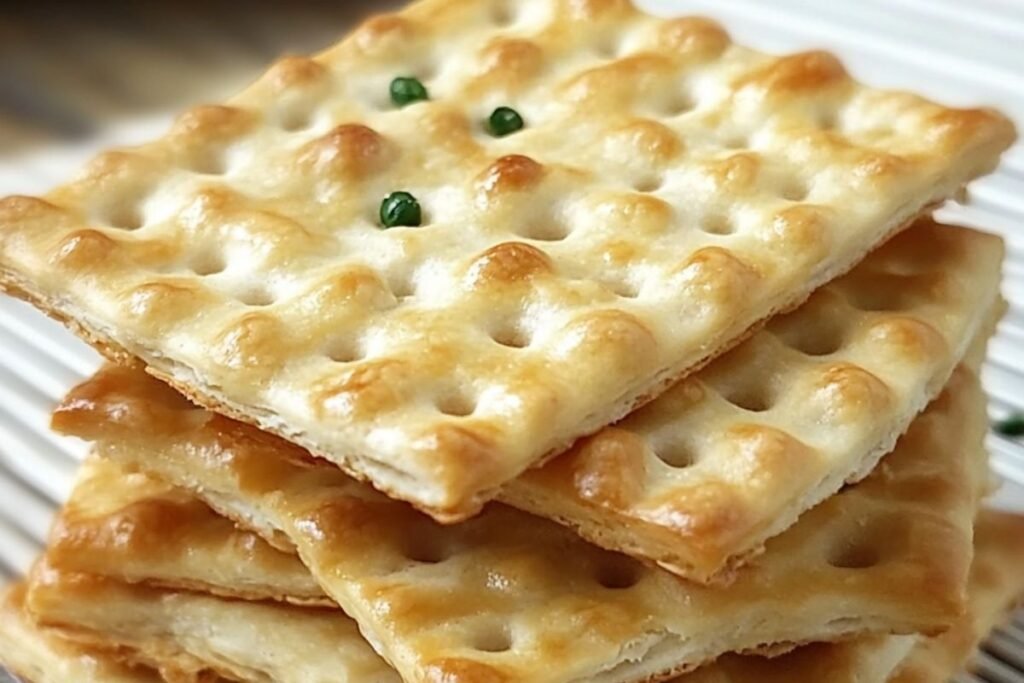
Place the cut crackers onto your prepared baking sheet. Use a fork to poke holes in each cracker. This “docking” prevents the dough from puffing up too much and keeps the crackers flat and crisp.
Step 8: Brush and Salt
Brush the tops with melted butter to enhance browning and flavor. Then lightly sprinkle with additional salt for that signature saltine taste.
Step 9: Bake Until Golden
Bake in your preheated oven for about 10 to 12 minutes, keeping a close eye to avoid burning. Your crackers should be golden brown and crispy.
Step 10: Cool and Store
Allow your crackers to cool completely on a wire rack before storing. This step helps them maintain crispness. Store in an airtight container for up to two weeks.
Expert Tips for the Best Homemade Saltine Crackers
- Don’t skip rolling thin! The secret to the ideal saltine cracker is ultra-thin dough.
- Use cold butter for brushing. It gives a delicate shine and richer flavor.
- Dock generously with a fork to ensure flat, evenly baked crackers.
- Experiment with toppings: Try sprinkling garlic powder, rosemary, or sesame seeds before baking for unique twists.
- Serve fresh: These crackers taste best the day they’re baked but keep well if stored properly.
Creative Ways to Enjoy Homemade Saltine Crackers
The beauty of homemade saltine crackers is their versatility. Here are some delicious ways to enjoy your crispy creation:
1. Classic with Soup or Chili
Nothing beats dipping fresh saltines into a hot bowl of chicken soup or chili. The crackers soak up flavors and add a delightful crunch.
2. Cheese and Charcuterie Boards
Pair your crackers with a selection of cheeses, cured meats, and olives. Their mild, buttery flavor complements a variety of toppings.
3. Nut Butter and Jam
Spread your favorite nut butter and a dollop of jam on these crackers for a quick snack or breakfast bite.
4. Homemade Cracker Crumbs
Crush your saltines to make breading for chicken or topping for casseroles. It’s a perfect way to reduce waste and add flavor.
5. Topped with Avocado or Hummus
For a healthy snack, top your crackers with creamy avocado or hummus and a sprinkle of chili flakes or herbs.
The History Behind Saltine Crackers
Did you know saltines have been around for over a century? Originating in the United States in the late 1800s, saltines were designed as a simple, affordable, and long-lasting cracker made from basic pantry staples. Their light, crisp texture and subtle saltiness quickly made them a household favorite, often enjoyed with soups or as a snack.
Homemade saltine crackers pay homage to this timeless classic but with the added joy of freshness and flavor customization. Now, making your own saltines is easier than ever and a fun baking project for any skill level.
Common Mistakes to Avoid When Making Homemade Saltine Crackers
- Not rolling thin enough: This will lead to thicker, less crispy crackers.
- Skipping the docking: Without holes, crackers puff and bake unevenly.
- Overbaking: Keep an eye to prevent burning, especially with thin crackers.
- Using hot water: Warm water is ideal to avoid affecting the dough’s texture.
- Not cooling properly: Storing warm crackers can make them soggy.
FAQs About Homemade Saltine Crackers
Q1: Can I make saltine crackers gluten-free?
A: Yes! Substitute all-purpose flour with a gluten-free flour blend that’s good for baking. Adjust liquid amounts as needed.
Q2: How long do homemade saltine crackers stay fresh?
A: When stored in an airtight container at room temperature, they stay crisp for up to two weeks.
Q3: Can I add flavors to the crackers?
A: Absolutely! Try sprinkling garlic powder, rosemary, sesame seeds, or even a little sugar for a sweet twist before baking.
Q4: Can I freeze the dough?
A: Yes, wrap the dough tightly and freeze for up to a month. Thaw overnight in the fridge before rolling out.
Q5: What’s the best way to roll out the dough evenly?
A: Use a rolling pin with thickness guides or roll between two sheets of parchment paper for an even thickness.
Q6: Are homemade saltine crackers healthier than store-bought?
A: Typically yes, since you control ingredients and avoid preservatives and artificial additives.
Conclusion
Making delicious homemade saltine crackers is a rewarding and surprisingly simple baking adventure that transforms basic pantry staples into a crispy, buttery, and perfectly salted treat. These crackers are infinitely versatile—perfect for snacks, entertaining, or elevating meals like soups and salads.
By mastering the technique of rolling the dough thin, docking each cracker, and brushing with butter, you’ll create crackers that rival or surpass any store-bought version. Plus, the ability to customize salt levels and add unique flavors means your homemade saltine crackers will always be a crowd-pleaser.
Whether you’re a seasoned baker or a curious beginner, this recipe delivers reliable, delicious results that are bound to impress family and friends. So preheat that oven, roll out the dough, and enjoy the crunch of fresh, homemade saltine crackers made with love.