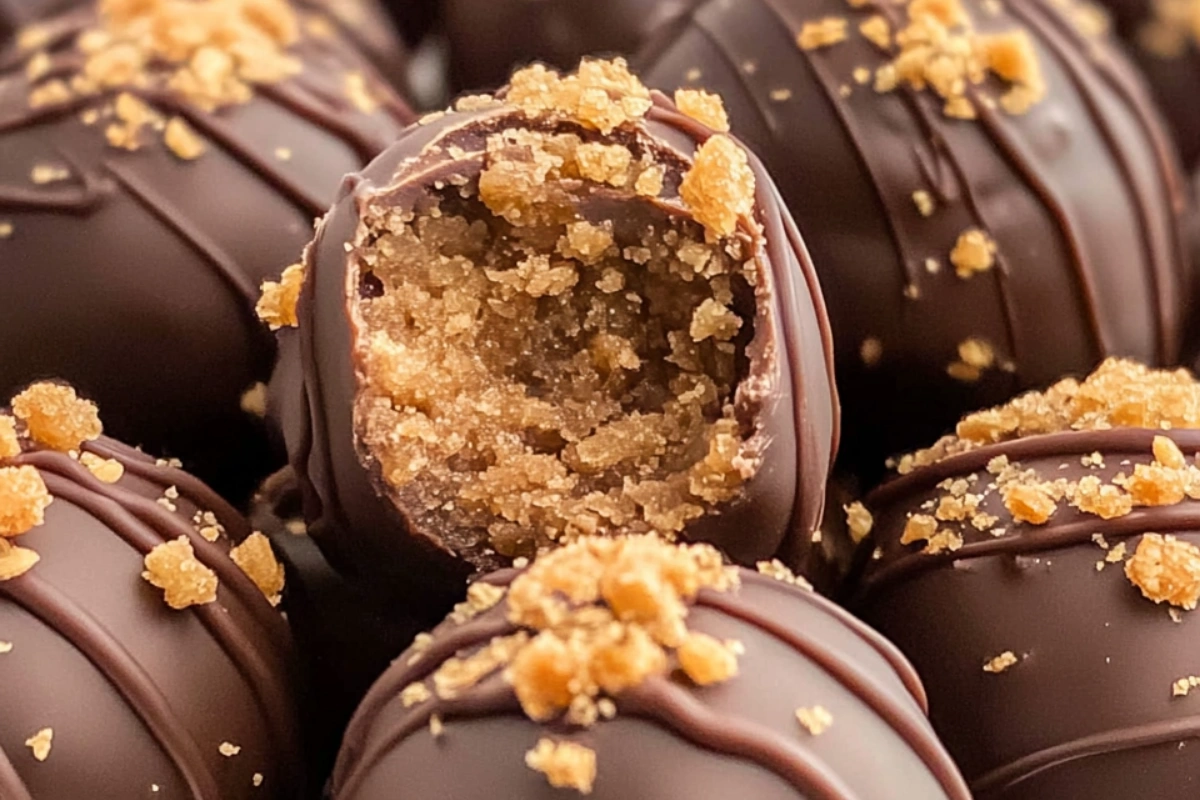
If you’re looking for a quick, easy, and absolutely irresistible dessert, Butterfinger Balls are the perfect treat! These rich, creamy peanut butter balls are loaded with crushed Butterfinger candy bars and coated in smooth, velvety chocolate, making them a must-try for any peanut butter and chocolate lover.
In this comprehensive guide, we’ll cover everything you need to know about Butterfinger Balls—from ingredients and step-by-step preparation to variations, storage tips, and FAQs. Let’s dive in!
Why You’ll Love Butterfinger Balls
- No-Bake Simplicity – No need to turn on the oven! Just mix, chill, and dip for a fuss-free dessert.
- Perfect Balance of Crunch and Creaminess – The smooth peanut butter filling is perfectly complemented by the crunch of Butterfinger candy and a luscious chocolate coating.
- Great for Any Occasion – Whether it’s a party, holiday, or quick treat, these bite-sized delights are always a hit.
- Make-Ahead Friendly – Store them in the fridge or freezer for a ready-to-go sweet snack anytime.
- Customizable – Easily switch up the chocolate, add toppings, or use different candies for a personalized touch.
Ingredients You’ll Need
To make Butterfinger Balls, you only need a handful of simple ingredients:
- 1½ cups creamy peanut butter
- ½ cup unsalted butter, softened
- ½ teaspoon vanilla extract
- 2 cups powdered sugar
- 1 cup crushed Butterfinger candy bars (plus extra for garnish, if desired)
- 3 cups semi-sweet chocolate chips
- 1 tablespoon coconut oil or vegetable oil (to help smooth the chocolate)

These basic ingredients come together to form an irresistible peanut butter and chocolate treat with just the right balance of crunch and sweetness.
Step-by-Step Instructions for Perfect Butterfinger Balls
1. Prepare the Peanut Butter Mixture
In a large mixing bowl, combine creamy peanut butter, softened butter, and vanilla extract. Use an electric mixer on medium speed to blend until the mixture is smooth and fluffy.
2. Incorporate the Dry Ingredients
Gradually add the powdered sugar, mixing on low speed until fully incorporated. Stir in the crushed Butterfinger candy bars, making sure they’re evenly distributed throughout the mixture. If you’d like, reserve some crushed Butterfinger for garnish.
Chill the mixture in the refrigerator for about 30 minutes to help it firm up, making it easier to shape into balls.
3. Shape the Balls
Once the mixture has firmed up, roll it into 1-inch balls using your hands. Place them on a parchment-lined baking sheet and chill for another 30 minutes to ensure they hold their shape when dipped in chocolate.
4. Melt the Chocolate
In a microwave-safe bowl, combine the semi-sweet chocolate chips and coconut oil (or vegetable oil). Microwave at 50% power for 1 minute, then stir. Continue microwaving in 30-second increments, stirring after each, until the chocolate is completely melted and smooth.
5. Dip the Butterfinger Balls
Using a fork or dipping tool, submerge each peanut butter ball into the melted chocolate, ensuring a full coating. Gently shake off excess chocolate and place the coated ball back on the parchment-lined baking sheet.
Optional: Sprinkle reserved crushed Butterfinger over the top before the chocolate sets for extra crunch and flavor.
6. Let the Chocolate Set
Allow the chocolate coating to set at room temperature until firm. Once set, transfer the Butterfinger Balls to an airtight container and store them in the refrigerator until ready to serve.
Tips for the Best Butterfinger Balls
- Chilling is key – Don’t skip the chilling steps! This prevents the balls from becoming too soft and messy when dipping in chocolate.
- Use quality chocolate – A good-quality semi-sweet or dark chocolate will give you the best flavor and texture.
- Crush Butterfinger evenly – Use a food processor or place Butterfingers in a zip-top bag and crush with a rolling pin for the best consistency.
- Experiment with coatings – Try white chocolate, milk chocolate, or even a drizzle of caramel for extra indulgence.
- Freeze for longer storage – Butterfinger Balls can be frozen for up to 3 months. Just thaw in the fridge before serving.
Frequently Asked Questions (FAQs)
1. Can I use chunky peanut butter instead of creamy?
Yes! Chunky peanut butter will add an extra crunchy texture to the filling.
2. How long do Butterfinger Balls last in the refrigerator?
They stay fresh for up to 2 weeks in an airtight container in the fridge.
3. Can I make these ahead of time?
Absolutely! These are a great make-ahead dessert, perfect for holiday gatherings and meal prepping.
4. What can I use instead of Butterfinger candy bars?
You can substitute Reese’s Pieces, crushed pretzels, or toffee bits for a unique twist.
5. Can I use almond butter or another nut butter?
Yes! While peanut butter gives the traditional flavor, almond butter, cashew butter, or even Nutella can work as alternatives.
Conclusion
Butterfinger Balls are an easy, no-bake, and incredibly delicious treat that combines the richness of peanut butter, the crunch of Butterfinger candy, and the smoothness of chocolate into one perfect bite. Whether you’re making them for a party, holiday event, or just to satisfy a sweet craving, these little delights never disappoint.
With a simple ingredient list and straightforward steps, anyone can master this recipe and enjoy a batch of Butterfinger Balls anytime. Try them today, and experience the perfect balance of sweet, salty, crunchy, and creamy in every bite!