Introduction
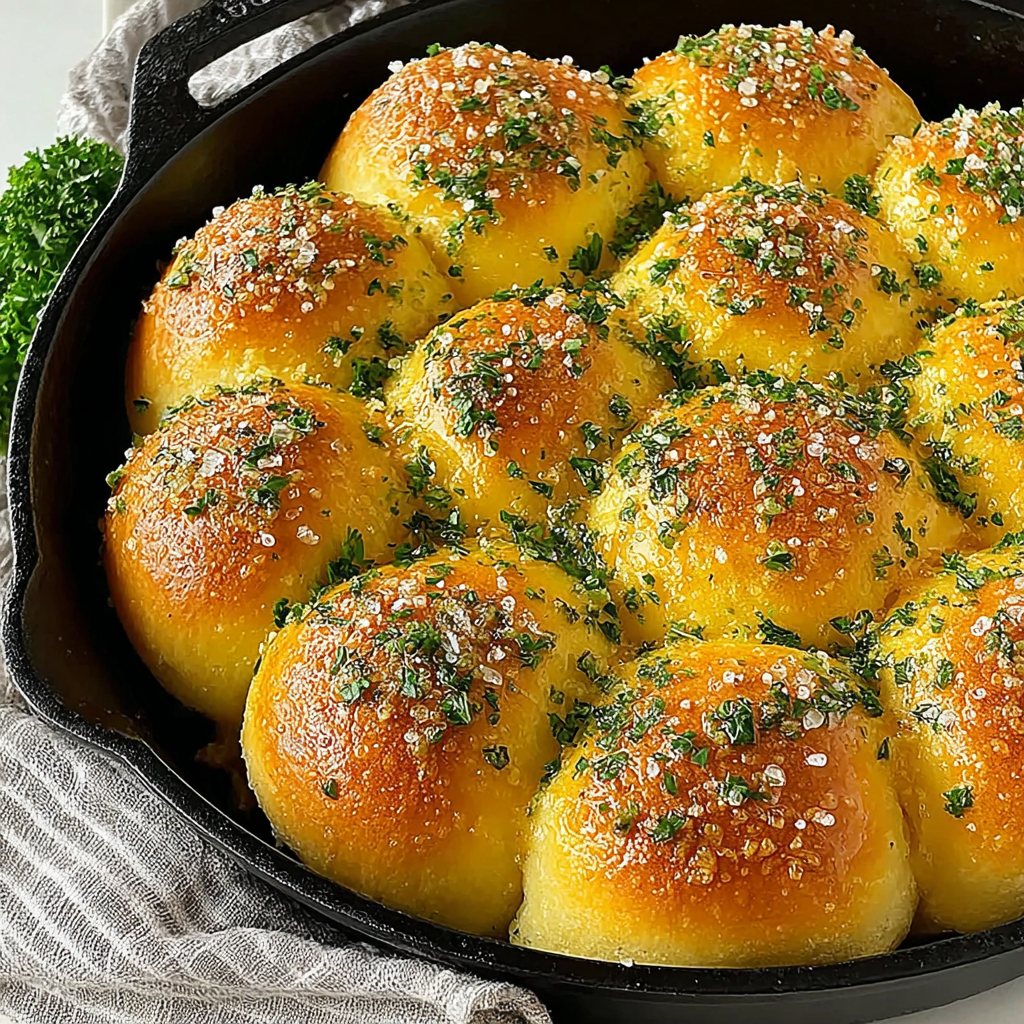
Dinner rolls are a beloved staple in many homes, bringing warmth and comfort to any meal. When baked in a cast iron skillet, they transform into a golden, fluffy delight that is hard to resist. The natural heat retention of cast iron ensures that each roll bakes evenly, developing a beautifully crisp crust with a soft interior.
Whether it’s a family gathering or a casual weeknight dinner, these rolls can elevate your dining experience. The beauty of making dinner rolls in cast iron lies not only in the taste but also in the presentation. The rustic charm of the skillet adds character, making every meal feel special.
Ingredients
- 4 cups all-purpose flour
The foundation of any bread, all-purpose flour provides the structure and chew to the rolls. Its moderate protein content allows for enough gluten development, making the rolls soft yet sturdy. - 1 packet (2 ¼ teaspoons) instant yeast
Yeast is the star of the show, responsible for fermentation and the rise of the dough. Using instant yeast allows for a quicker rise, which is perfect for faster bread preparation. - 1 ½ teaspoons salt
Salt enhances the flavor of the rolls and strengthens the gluten, contributing to their texture. The right amount of salt is crucial; too little can lead to blandness, while too much can inhibit yeast activity. - 3 tablespoons sugar
Sugar is not just for sweetness; it feeds the yeast and aids in browning the crust. It helps create a tender crumb and caramelizes during baking for a beautiful golden finish. - 1 ½ cups warm milk (110°F)
Warm milk hydrates the flour and activates the yeast. It also enriches the dough, adding a subtle creaminess that enhances the flavor and texture of the rolls. - ¼ cup unsalted butter, melted
Butter adds richness and flavor while helping to create a tender crumb. The fat coats the flour proteins, limiting gluten development, which keeps the rolls soft. - 1 large egg
Eggs contribute moisture and richness, adding to the overall texture of the rolls. They also help bind the ingredients together, improving structure and enhancing the dough's ability to rise.
Directions & Preparation
Step 1: Combine dry ingredients
Start by whisking the flour, instant yeast, sugar, and salt in a large mixing bowl. This ensures that the yeast and salt are evenly distributed throughout the flour, which is crucial for a balanced flavor and consistent rise. Mixing the dry ingredients well prepares them for the addition of wet ingredients.
Step 2: Mix warm milk and melted butter
In a separate bowl, combine the warm milk with the melted butter, letting it cool slightly. Warm milk activates the yeast, while butter adds richness to your rolls. Make sure the mixture is warm but not hot to ensure the yeast remains active.
Step 3: Add wet to dry ingredients
Pour the milk and butter mixture into the dry ingredients and mix until a shaggy dough forms. This initial blend allows the flour to hydrate and the yeast to start working, setting the stage for gluten development.
Step 4: Knead the dough
Turn the dough out onto a lightly floured surface and knead for 8 to 10 minutes until smooth and elastic. Kneading activates the gluten, which is essential for the rolls to rise properly and develop their structure.
Step 5: First rise
Place the kneaded dough in a greased bowl, cover it with a damp cloth, and let it rise in a warm place until doubled in size, about 1 hour. This fermentation time allows the flavors to develop and the yeast to do its job, creating tender, airy rolls.
Step 6: Shape the rolls
Once risen, punch down the dough gently to release excess air, then divide it into 12 equal pieces. Shape each piece into a ball and ensure they are smooth on the surface. This shaping step contributes to the final appearance and helps create a nice rise during the baking process.
Step 7: Second rise
Arrange the shaped rolls in a greased cast iron skillet, ensuring they are close but not touching. Cover with a kitchen towel and allow them to rise again for about 30 minutes. This second rise ensures the rolls are light and fluffy, ready for baking.
Step 8: Preheat oven
While the rolls rise, preheat your oven to 375°F (190°C). A preheated oven is essential for achieving that beautifully crispy exterior, as it creates steam that helps the rolls rise rapidly when first placed inside.
Step 9: Bake the rolls
Bake the rolls in the preheated oven for 20 to 25 minutes, until golden brown. Keeping an eye on them during baking is important, as even a few minutes can make a difference in achieving that perfect color and texture.
Step 10: Cool and serve
Once baked, let the rolls cool in the skillet for about 10 minutes before serving. This short cooling period allows the rolls to firm up slightly without losing their soft interior. Enjoy them warm, perhaps with a smear of butter or your favorite dip!

Why Cast Iron for Baking?
Baking dinner rolls in cast iron offers distinct advantages that enhance their texture and taste. The material retains heat exceptionally well, which promotes even baking and allows for a beautifully browned crust. Additionally, the skillet’s heavy base helps prevent hot spots, ensuring that each roll is cooked consistently, making it a perfect vessel for this recipe.
Flavor Variations to Explore
Though these rolls are delicious on their own, there are plenty of ways to infuse them with exciting flavors. Consider adding minced garlic to the dough for garlic rolls, or herbs like rosemary or thyme for an aromatic touch. For a sweet twist, incorporate cinnamon and sugar into the dough or experiment with cheese for savory goodness.
The Importance of Temperature
The successful rise of your dinner rolls hinges on temperature, both in your ingredients and in their environment. Using warm milk is critical for activating the yeast, while the ambient temperature should be warm and draft-free during the rising phases. This attention to temperature ensures you achieve that light, fluffy texture we all love.
FAQs
What if my dough is too sticky?
If your dough is sticky, lightly flour your work surface and your hands as you knead. Adding a small amount of flour gradually ensures the dough remains manageable without becoming tough.
Why are my rolls dense?
Dense rolls can result from under-kneading or using expired yeast. Make sure to knead until the dough is smooth and elastic and check that your yeast is fresh for optimal rise.
Can I make mini rolls instead?
Yes, if you prefer mini rolls, divide the dough into smaller pieces before shaping and allow them to rise and bake for slightly less time to prevent overcooking.
Why did my rolls bake unevenly?
Uneven baking can occur if the skillet is placed on an uneven surface or if the rolls are spaced too closely together. Ensuring an even distribution and proper alignment in the oven helps achieve uniform baking.
What should I do if my rolls are too dry?
If your rolls turn out dry, it may have been due to over-baking or excessive flour used during kneading. To rectify this in the future, monitor baking time closely and use measurements accurately.
Is there a way to make these rolls whole wheat?
You can substitute part of the all-purpose flour with whole wheat flour for a nuttier flavor and added nutrition. Start with a 50/50 ratio and adjust as necessary based on dough consistency.
Conclusion
Making dinner rolls in a cast iron skillet not only delivers on taste but also brings a touch of nostalgia to the table. With a simple list of ingredients and a few key techniques, you can create rolls that your family will look forward to time and again.
Embrace the process of baking with patience and care, allowing the dough to rise and develop its flavors fully. With these rolls, every meal can be enhanced, bringing joy and comfort to your dining experiences.
Recipe Card
Fluffy Cast Iron Skillet Dinner Rolls Recipe
Ingredients
- 4 cups all-purpose flour
- 1 packet 2 ¼ teaspoons instant yeast
- 1 ½ teaspoons salt
- 3 tablespoons sugar
- 1 ½ cups warm milk 110°F
- ¼ cup unsalted butter melted
- 1 large egg
Instructions
- Combine dry ingredients
- Mix warm milk and melted butter
- Add wet to dry ingredients
- Knead the dough
- First rise
- Shape the rolls
- Second rise
- Preheat oven
- Bake the rolls
- Cool and serve
Notes
Additional serving suggestions: pair with a crisp salad, garlic bread, or roasted seasonal vegetables for balance.
For make-ahead, prep components separately and assemble just before heating to preserve texture.
Taste and adjust with acid (lemon/vinegar) and salt right at the end to wake up flavors.